Guide
How to Inspect a New Monitor
Buying a new monitor? Learn how to inspect a new monitor for dead pixels, display flaws, and build issues before your return window closes. Use this actionable guide to catch any problems early.
Updated 2026-07-05
Why Inspecting a New Monitor Matters
A new monitor is a significant investment in your setup, whether for gaming, work, or creative projects. Unfortunately, even brand-new displays can arrive with issues like dead or stuck pixels, uneven backlighting, or physical damage. Many manufacturers have strict return policies, making early inspection critical.
Inspecting your new monitor as soon as it arrives helps you catch problems within the return or exchange period. Using dedicated tools like the Dead Pixel Test can reveal subtle pixel flaws you may not notice during regular use. This straightforward process ensures you get the quality you paid for and avoid long-term headaches.
Beyond pixel issues, checking for cosmetic defects, port functionality, and panel uniformity will ensure your monitor operates as expected. A thorough inspection takes less than 30 minutes and can save you from years of frustration if problems go unnoticed.
Key Areas to Inspect on a New Monitor
Start by unboxing your monitor carefully. Look for physical defects such as scratches, dents, or cracked panels. Next, set up the monitor according to the manufacturer’s instructions, connecting it to your computer and ensuring it receives power.
Turn on the monitor and let it warm up for 15 to 30 minutes. This allows any transient display issues to show up. Check the screen for uneven brightness, color tints, or backlight bleeding, especially around the edges. Use high-contrast backgrounds and solid color images to spot these problems.
With the monitor warmed up, run the Dead Pixel Test to check for dead or stuck pixels. This tool displays fullscreen color patterns, making it easy to spot even single-pixel issues. Slowly scan the entire screen with your eyes, looking for dots that do not change color or remain stuck on one color.
Test all input ports by connecting different devices, such as laptops or gaming consoles. Confirm that HDMI, DisplayPort, and USB-C (if present) function correctly. Lastly, inspect the monitor’s stand for stability and the on-screen display (OSD) controls for responsiveness. Make sure the monitor’s firmware is up to date if the manufacturer provides updates.
Step-by-step
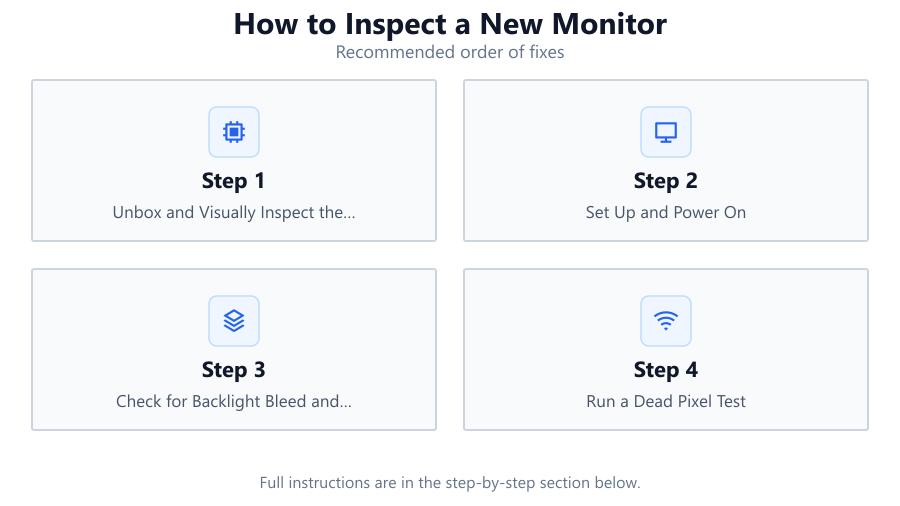
Unbox and Visually Inspect the Monitor
Carefully remove the monitor from its packaging. Check the panel, bezels, and stand for any physical damage, scratches, or loose parts. Note any defects immediately and photograph them for possible warranty claims.
Set Up and Power On
Assemble the monitor following the manufacturer’s guide. Connect it to your PC or laptop using the recommended cable. Power on the monitor and allow it to warm up for at least 15 minutes.
Check for Backlight Bleed and Uniformity
Display a solid black image in a dark room. Look for light leaking around the edges or corners (backlight bleed). Switch to gray and white backgrounds to check for color uniformity and panel consistency.
Run a Dead Pixel Test
Open the Dead Pixel Test to display solid color backgrounds (white, black, red, green, blue). Methodically scan the screen for dead (black), stuck (always colored), or hot (always white) pixels. Use the tool’s marking feature to note any issues for later reference.
Test All Inputs and Features
Connect different devices to every available port (HDMI, DisplayPort, USB-C) to confirm each works properly. Navigate the on-screen display menu to check settings, brightness adjustments, and firmware version. Test built-in speakers and USB hubs if available.
Comparison
| Inspection Area | What to Look For | Tools/Method |
|---|---|---|
| Physical Condition | Scratches, cracks, loose stand | Visual check, photograph issues |
| Backlight Bleed | Light leaks at screen edges | Solid black image in dark room |
| Dead/Stuck Pixels | Non-responsive or colored pixels | Dead Pixel Test tool |
| Port Functionality | Non-working HDMI/DP/USB-C | Test with multiple devices |
| Panel Uniformity | Color/tint inconsistencies | Solid gray and white backgrounds |
Common mistakes
Mistake
Not inspecting the monitor within the return window
Fix: Always check your monitor as soon as it arrives so you can return or exchange it if needed.
Mistake
Skipping dead pixel tests
Fix: Run a Dead Pixel Test using dedicated tools to catch subtle pixel flaws.
Mistake
Ignoring port and feature testing
Fix: Test every input and feature, including OSD controls and built-in speakers, to ensure full functionality.
Mistake
Inspecting in poor lighting conditions
Fix: Perform pixel and uniformity checks in a controlled lighting environment for accurate results.
Troubleshooting
Spots or dots visible on solid colors
Likely cause: Dead, stuck, or hot pixels
What to do: Mark affected areas with the Dead Pixel Test tool. Contact the manufacturer for warranty support if above their pixel defect threshold.
Uneven brightness or color patches
Likely cause: Backlight bleed or panel uniformity issues
What to do: Adjust brightness, try different viewing angles. If severe, request a replacement within the return period.
No signal or image on certain ports
Likely cause: Defective cable, port, or incompatible settings
What to do: Test with alternate cables and devices. Update firmware if available. If the issue persists, pursue a warranty claim.
Flickering or artifacts on screen
Likely cause: Cable interference, loose connections, or panel defects
What to do: Secure all cables, try another power outlet, and test with a different device. If unresolved, contact support.
Recommendations
- Inspect your monitor immediately after unboxing to maximize your return options.
- Use the Dead Pixel Test for a thorough pixel and color check.
- Keep all packaging and accessories until you are sure the monitor is problem-free.
- Photograph and document any issues for warranty or return claims.
- Test the monitor in both bright and dark environments to spot all potential flaws.
Frequently asked questions
How soon should I inspect my new monitor after delivery?
Inspect your monitor as soon as possible, ideally within the first 24 to 48 hours, to ensure you are eligible for a return or exchange if issues are found.
What is a dead pixel and how can I spot it?
A dead pixel is a pixel that does not light up at all, appearing as a small black dot. You can spot dead pixels using the Dead Pixel Test, which displays solid colors to highlight these flaws.
How many dead pixels are acceptable on a new monitor?
Most manufacturers have a pixel policy detailing how many dead pixels are allowed before a replacement is offered. Check your warranty terms, as this number varies by brand and model.
Can I fix a stuck or dead pixel myself?
Sometimes, gently massaging the affected area or running pixel-fixing software can revive stuck pixels, but dead pixels are usually permanent. For new monitors, request a replacement if possible.